Most hardwood flooring change orders happen because someone skipped a step in the spec process. Wrong width was approved. Sample didn't represent the production batch. Subfloor wasn't moisture-tested before install. The fix is always more expensive than doing it right the first time. Here's the 8-step spec process Houston designers, builders, and architects should run on every project to lock the right floor and avoid surprises.
Step 1: Define the Project Constraints
Before species or finish, document:
- Foundation type: slab-on-grade, pier-and-beam, or second-floor
- Radiant heat: yes or no (affects construction choice)
- Square footage: total and per room, plus pattern direction
- Budget range: material per sq ft + install + freight
- Timeline: when material needs to be on-site for install
These constraints narrow your options dramatically before you start looking at samples.
Step 2: Choose Construction (Solid vs Engineered)
For Houston slab-on-grade construction (most new builds), engineered is the right answer — it's more dimensionally stable in our humidity, can be glued down or floated, and works with radiant heat. Solid hardwood works on pier-and-beam and second floors where vertical movement isn't a concern.
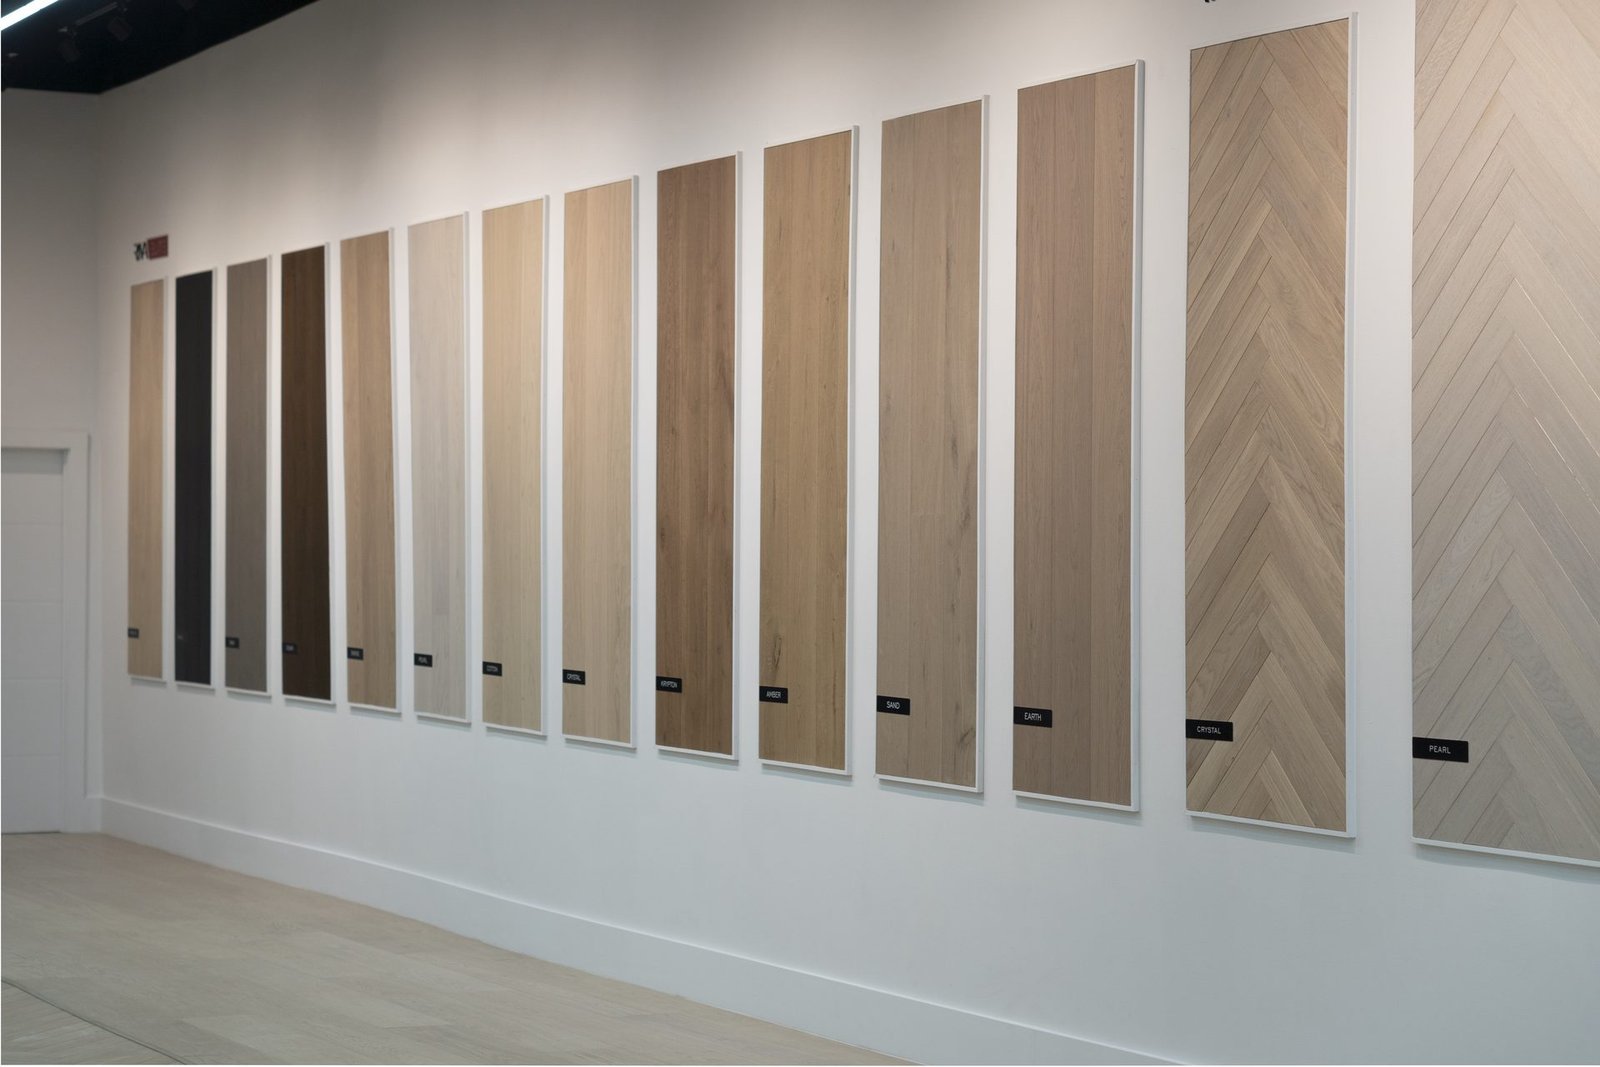
Step 3: Species + Grade
European White Oak is the default for Houston luxury residential. Decide grade (Select, Character, or Rustic) based on the project aesthetic.
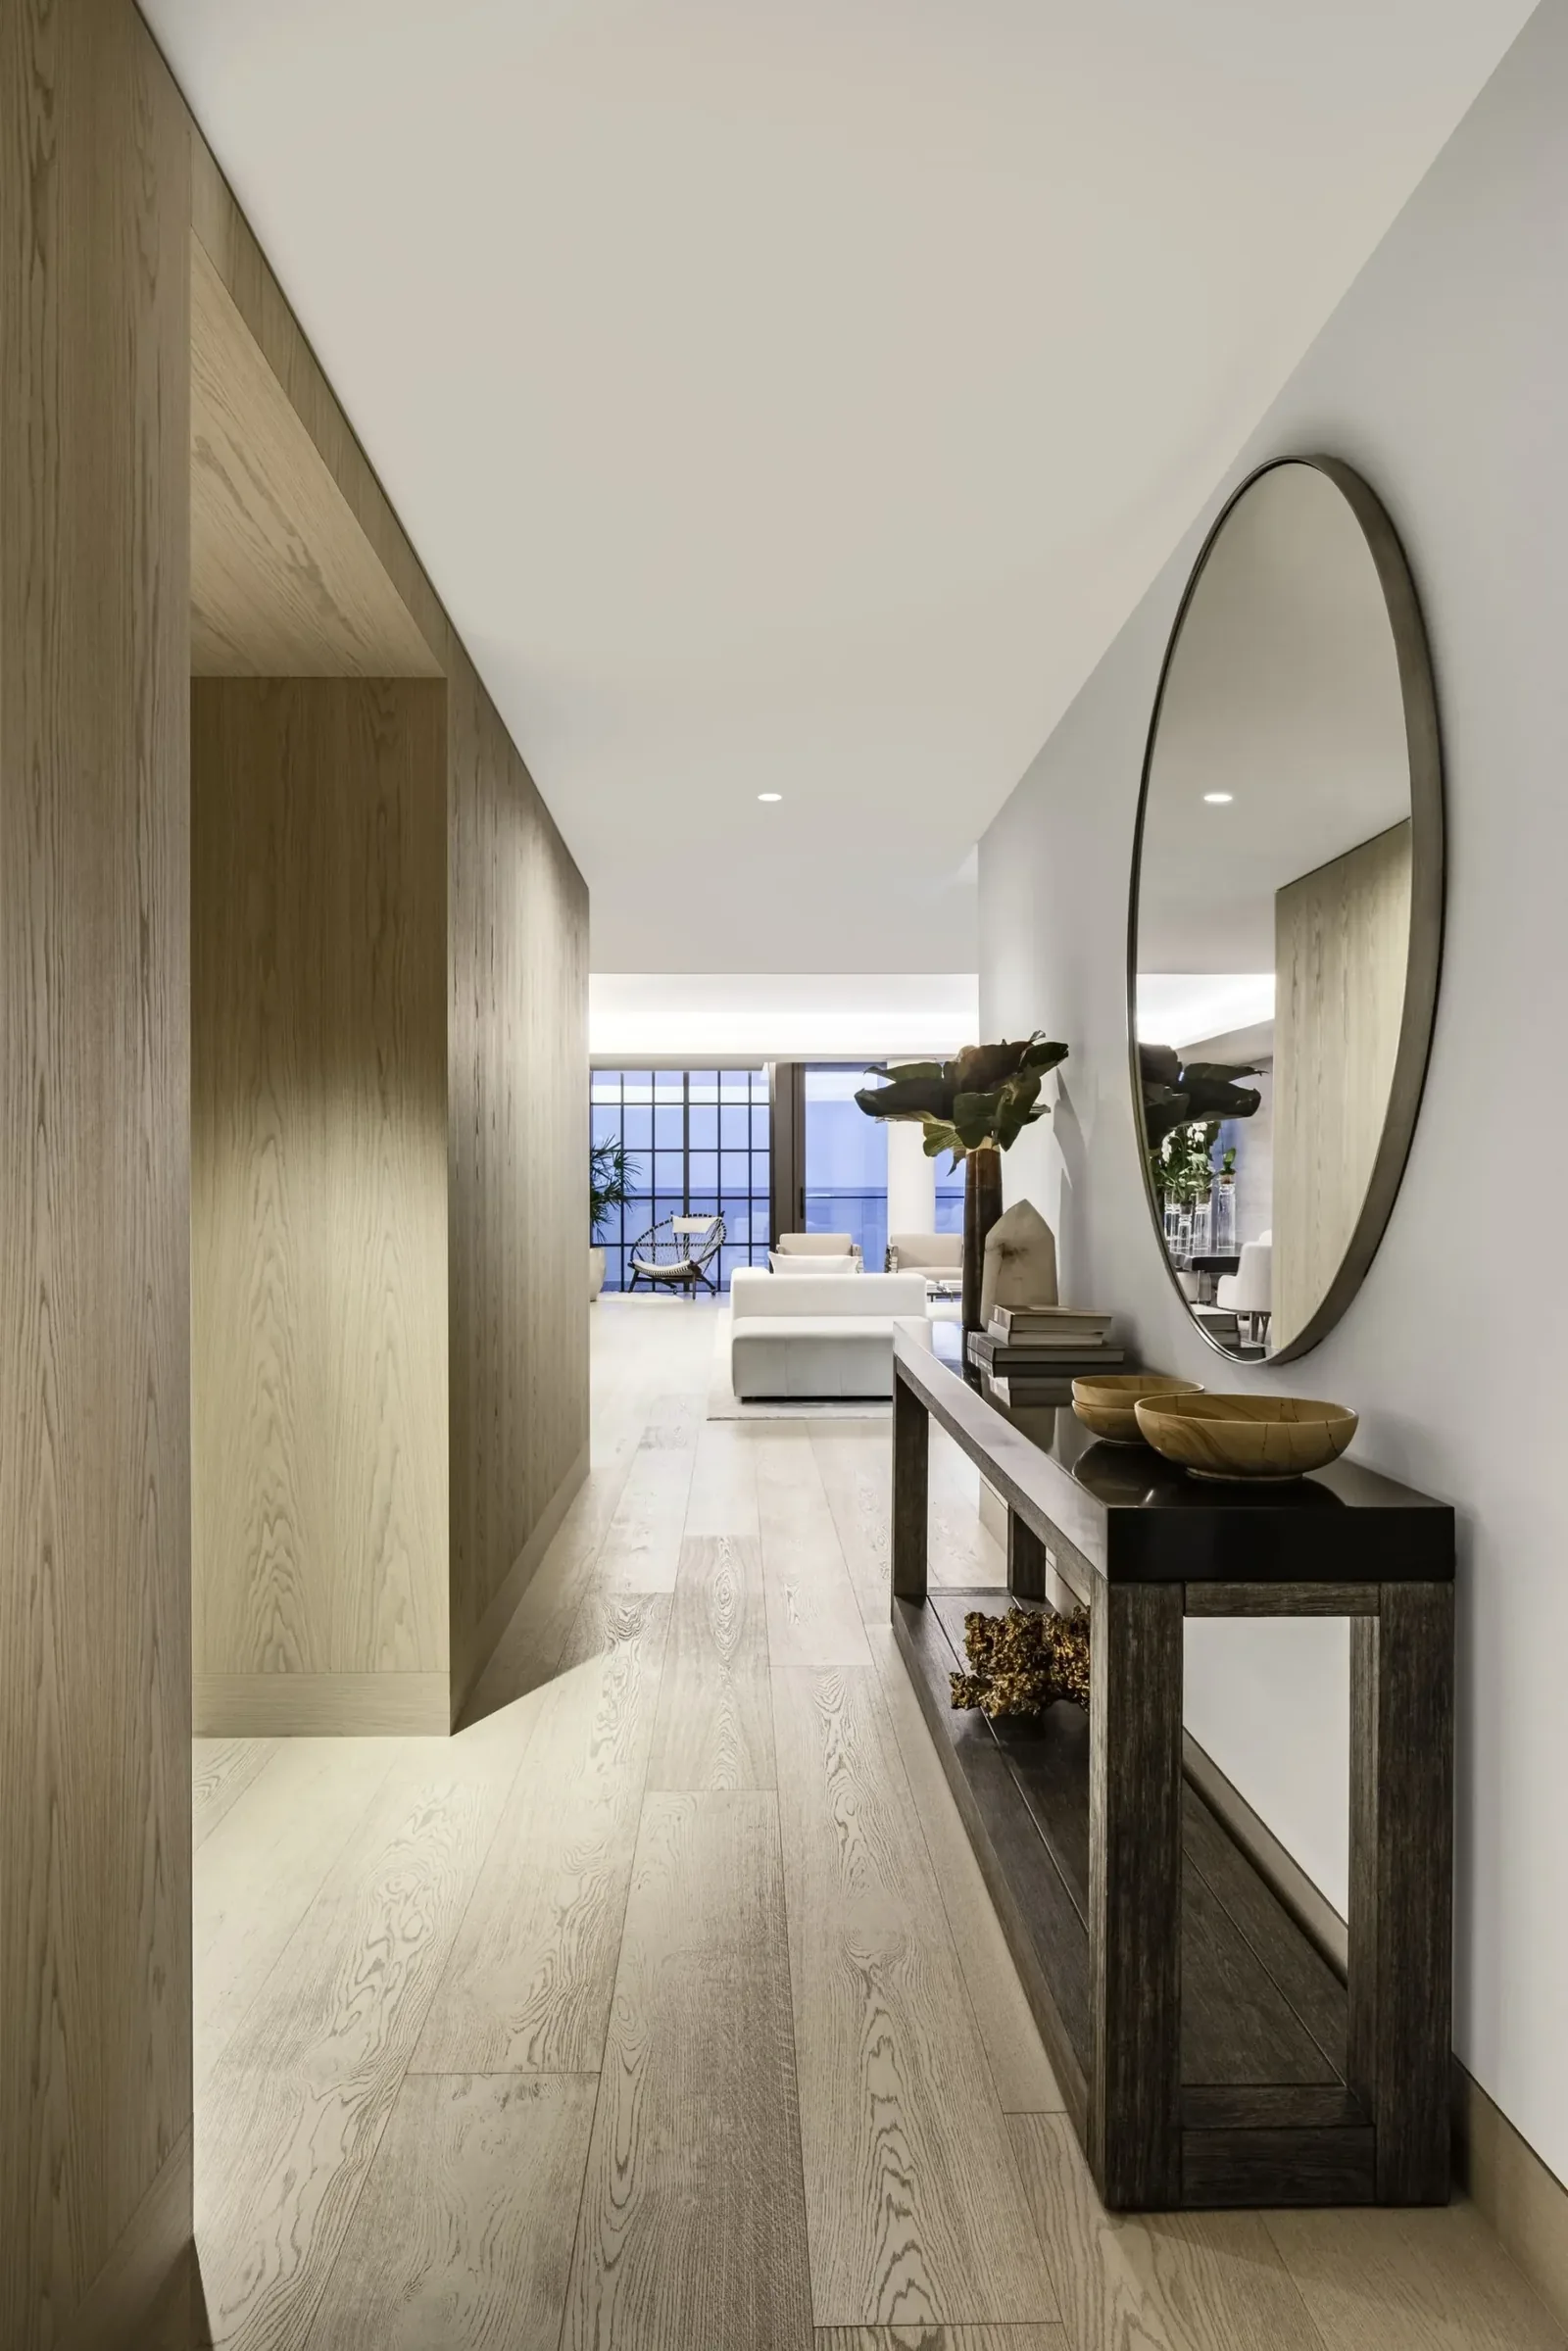
Step 4: Width + Pattern
Width drives the visual scale. Pattern (straight, herringbone, chevron) drives the formality and budget.
- 5-6″ wide: traditional, smaller rooms
- 7-8″ wide: contemporary luxury default
- 10-12″ wide: open-plan modern, vaulted ceilings
Step 5: Finish Selection
Three options for most projects:
- Hand-rubbed oil: warmest patina, can be refinished, requires periodic re-oiling
- UV-cured matte: most durable, lowest maintenance, slightly less depth
- Pre-stained: color-matched to design palette
Specify finish in the same sample order as the species — finish reads differently on different grades.
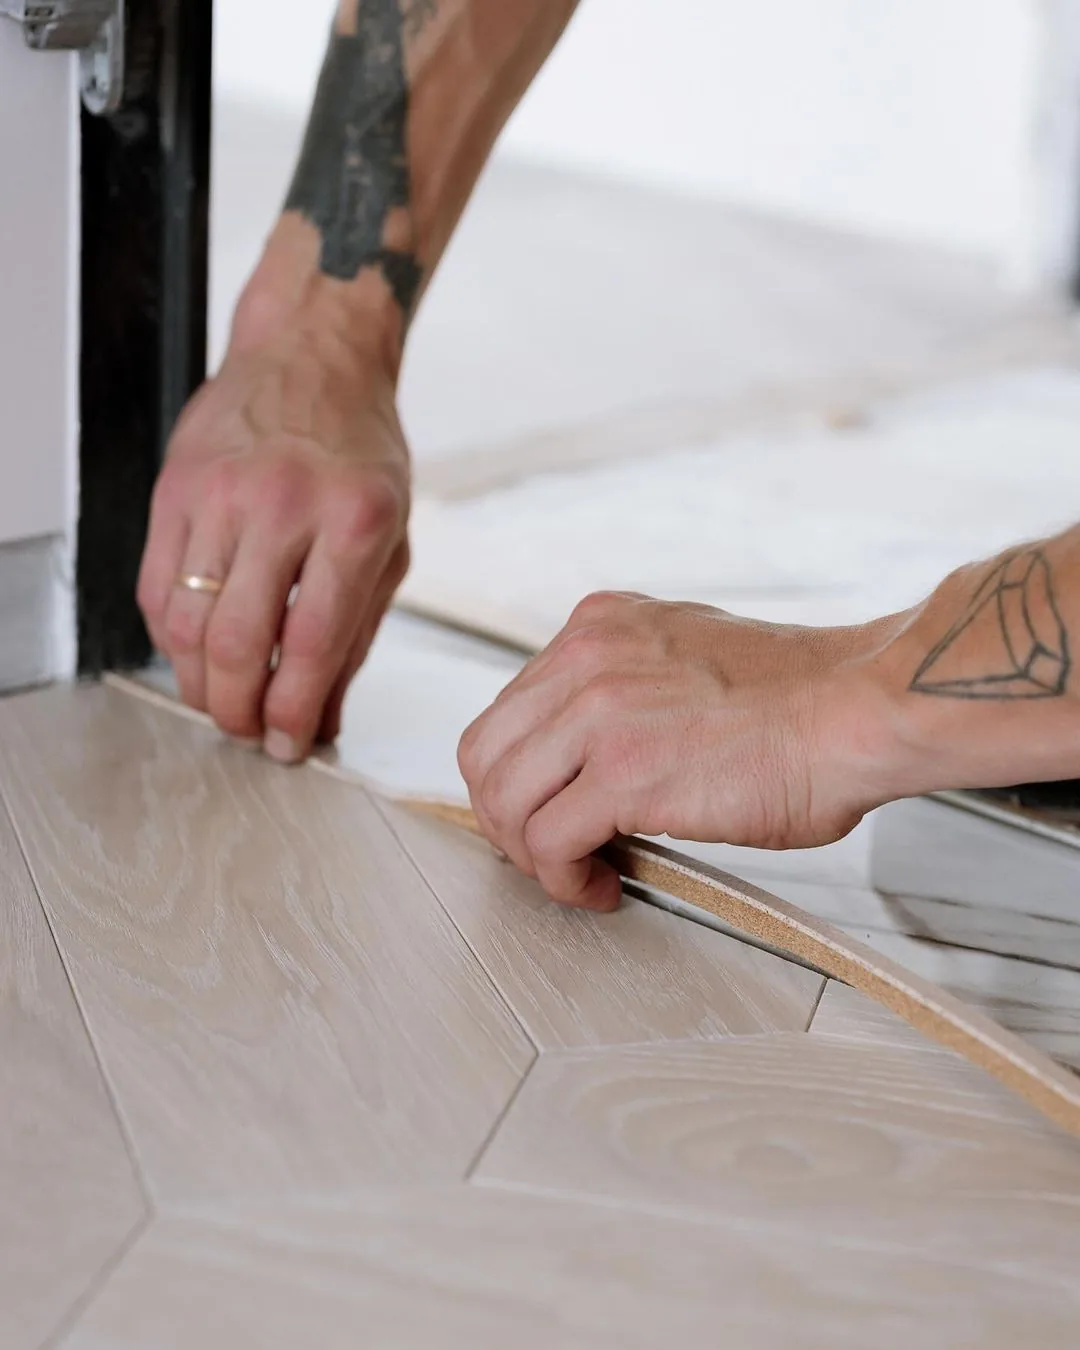
Step 6: Sample Approval (Don't Skip This)
Order full-size production samples — not the small 4x4″ chip samples. Production batches vary slightly in color and grain. The 4x4″ sample tells you nothing about how 1,000 sq ft of the same product will read on a floor.
Have the client physically sign off on the full-size sample board before placing the production order. This is the single most important step for avoiding change orders.
Step 7: Subfloor Moisture Test
Before delivery, test the subfloor moisture content. Slab should be below 4% MC for engineered installation. Wood subfloors should be within 4% of the hardwood's acclimated moisture content.
Have the install crew document subfloor MC in writing before laying material. If a problem develops 6 months post-install, the moisture log is your protection.
Step 8: Acclimation + Install + Sign-Off
Acclimate material 48-72 hours on-site before install. Install per manufacturer spec — adhesive type, expansion gap, transition treatment. Final walkthrough with client to sign off on coverage, transitions, and finish quality.
The 5 Mistakes That Cause Most Change Orders
- Approving the wrong sample size. 4x4″ chips don't represent production batches.
- Skipping moisture testing. Slab moisture issues cause cupping 3-6 months post-install.
- Wrong construction for the foundation. Solid hardwood on slab WILL cup over time in Houston humidity.
- Mismatched transitions. Specify transition profiles BEFORE install, not during.
- Ordering tight quantity. Always order 7-10% overage for waste, future repairs, and pattern matching.
Working a Houston trade project? Email Samin at samin@jamailhardwoods.com with your project specs and we'll run the full quote process from species to install sign-off.